AUTOCORD : the Minolta's TLR
by Fred
Before loading a film in the camera, test its functioning : the shutter cocking, the trigger, the shutter, the various speeds, the diaphragm, the flash plug, the self timer, the focus lever, the light seal, the light meter cell, the lenses.
1) Cocking the shutter, the trigger.
By performing a half or full turn of the crank, you arm the shutter.
If the shutter doesn't arm, there is a problem.
Press the shutter button and watch the shutter opening and closing by emitting a "chklic".
Check : remove the lens cover (read "Focus lever", points 1 to 3) and check
that the crank arms the shutter well : by turning the crank, a lever moves a rod which rocks the shutter cocking lever.
If the shutter cocking lever returns to its original position, there is a problem. Contact me.
Remark : the lever is not visible on models I, II, III, CDS I, CDS II and CDS III.
It is necessary to look in the slot of the obturator (see photo).
2) The trigger.
If the release button is difficult to press, turn the toothed wheel and move the black dot away from the red dot.
When these two dots are side by side, the trigger is blocked : this is a security
to avoid exposing the film if it was moved forward and you decide to postpone
the shooting until later.
If the shutter does not fire, there is a problem.
Check that the release lever actuates the shutter release.
2.1) If the trigger button lever does not operate the shutter trigger at all, unhook the shutter and take the black block off (3 screws) to check the integrity of the trigger button.
2.2) If the trigger button lever does not actuate the shutter trigger enough, the shutter is improperly positioned. Loosen the shutter fixing ring (inside the dark room), rotate the shutter to bring the shutter trigger closer to the trigger button lever, hold in place and tighten the shutter fixing ring.


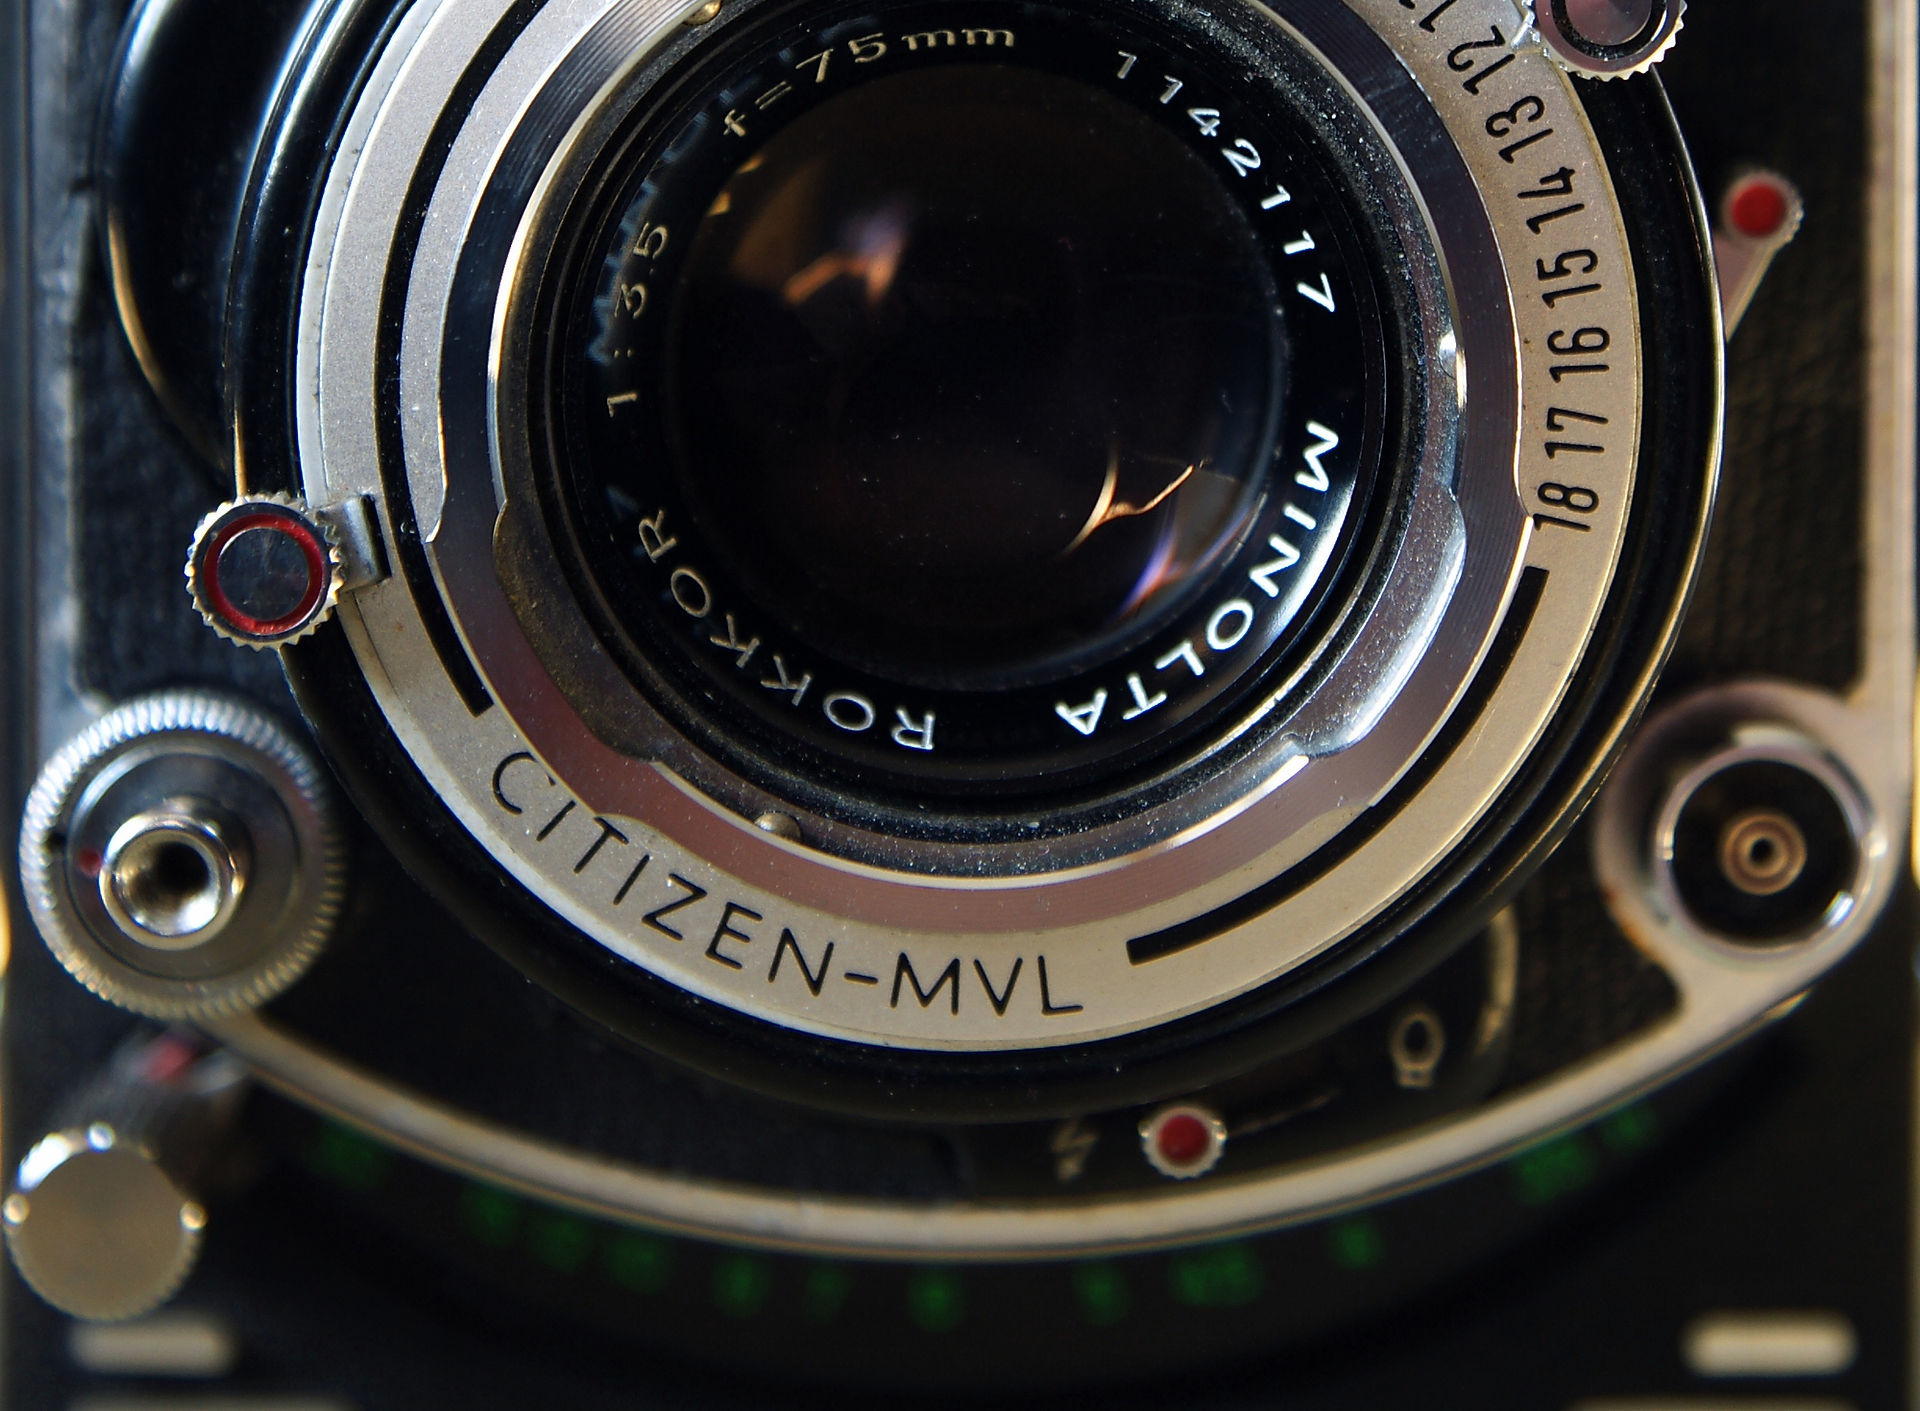
3) The shutter.
Move the control knob of the shutter - right hand side of the objective,
with a red circle - upward for low speeds as well as position B, downward for high speeds.
If the knob doesn't move, there is a problem.
Using a stopwatch 1/100 sec, you can check the opening time for the positions from 1 to 5
wich are of 1 sec to 1/5 sec.
Take into account your response time following the mode of observation
which you choose : with your eyes or with your ears.
Several tries will be necessary. You can use a flexible cable release.
A special tool is required to test the speeds above 1/5 sec.
If the different opening times seem abnormal, there is a problem.
If the shutter doesn't react, there is a problem.
If the B position doesn't work properly, there is a problem.
Remedy : clean the shutter or contact me.
Would you want an accuracy check of your shutter? Contact me.

4) The diaphragm.
Settle the shutter to the B position - lever with a red circle at the top.
The letter B has to appear in the small window situated over the viewing lens.
Arm the shutter, press on the trigger and hold it pushed.
With the other hand, move the setting lever of the diaphragm - left side of the lenses,
with a black circle - upward and downward.
If the blades do not move, there is a problem.
If the blades do not form a well-centered hole, there is a problem.
If the blades shine, there is a problem.
Remedy : if you have the patience and the dexterity of a watchmaker, you can open the diaphragm (backside of the shutter). If not, contact me.
Before unsettling the blades - danger, they are very fragile -, observe attentively their positioning because you will have to replace them as they are there.
Clean them with some methyl alcohol, dry on some absorbent paper then put them back in place with tweezers.
Trick : they overlap all, make the last one slide under the first one. If only one of them is badly positioned, repeat the whole placement procedure.
The patience is a virtue and the reward as high as your effort.

5) The flash plug.
The flash connecting plug is the PC model.
Arm the shutter, connect an appropriate cable between the camera and a flash,
trigger the shutter.
If the flash does not fire, there is a problem.
Remedy : make sure your flash is in working order.
Check the condition of the flash wire, one can be cut in an insulating sheath without it shows.
Check the status of the plug (corrosion, fouling, other).
Check the wires coming from the flash plug are in working order ( connected, whole ) - open the lens cover to access them.
If the flash fires when connecting the plug and then doesn't fire anymore, there is a problem.
Remedy : there is a closed contact either between the slats outside the shutter (where the wires are soldered, spread them slightly), or inside the shutter (contact me because it is necessary to open the shutter).

6) The self-timer ( if the camera is provided with one).
Arm the shutter, swing the self-timer lever, press the shutter button, the self-timer
lever moves back slowly while the mechanism makes 'rrrrrrrrrrrh '.
The shutter fires after about ten seconds.
If the timer stops before the shutter fires, help it a little, it is lacking training .
Repeat several times.
If the timer doesn't move there's a problem.
Remedy : the timer module is inside the shutter, it must be lubricated and cleaned. Or replaced.
Use a stopwatch to determine the duration of the timer.

7) The focus lever.
In general, the focus lever is smooth and slow to move.
Do not force excessively : it is zamac and may break. This is the weak point of the Autocord.
If the lever is stuck, there is a problem.
Remedy : you must change the grease (white lithium) that lubricates
the bronze focusing helicoïd (read "Focus lever" in "Tips and Tricks").
8) The light-tightness.
Given the honorable age of these cameras, it is good to check the condition of the rope located in the back cover groove.
It must be fully and properly aligned.
The edge of the back cover along the hinge is a flat edge and is covered with a strip of cloth like velor with short hair. The tissue can be uneffective. This place remains however less critical because the film is then wound onto the second reel.
Also check the condition of the edges of the dark room : no notch, no hitch, no lack of black paint on the inside.
Also check that the rear cover hinges are in the correct direction : the bottom elbow should be facing the front of the camera - read the "Light-tightness" page.
The only way to check for light leaks of your camera remains the exposure of a film : take pictures.
-) first a black picture : advance the film to frame 1 then place it on a window sill for one hour. Turn the camera a quarter of a turn every quarter of an hour. Thereafter hold the camera in a camera bag until you've taken the 12 photos. Take a black photo for better result : set aperture on 22, set shutter speed at high value (400 or 500), place a tissue or a lens cover against the taking lens, release the shutter.
-) other pictures : take the camera out of the camera bag only when taking a photo, use a sun hood if the sun is in front of you.
After film development if the first pict shows one or more streaks of light, light seal must be changed.
Remedy : replace the cord by thin foam strips for cameras (read the "Light-tightness" in "Tips and Tricks").
Also think of removing dust in the whole dark room so as to avoid dust deposit on film while you take picts.
Also clean the thin film guide rollers with methyl alcohol.
9) The lightmeter cell.
Some models are equipped with a selenium lightcell (all L models), others with a CDS lightcell (all CDS models).
a) selenium cell : it is located under the "minolta AUTOCORD" cover.
The display module is located on the left hand side of the camera.
When the cover is lifted, the needle immediately indicates the amount of light in EV unit.
This cell works without battery.
Given the age of the equipment, it is deeply advised to check the response accuracy
of the cell by comparing with a modern cell.
If a gap is noticed, notice it on the display module and adjust your settings.
If the needle does'nt react, there is a problem.
Remedy : the wires connecting the cell to the display may be broken. Unscrew the display and check. If wires are good, the cell is dead. Replace the cell (if you can find another one).
b) CDS cell : it is located above the viewing lens.
The display module is located on the left hand side of the camera.
This unit requires a 1.35 V battery (read "CDS lightmeter battery" page
in the "Tips & Tricks").
Refer to owner's manual for details (see the "Related Sites" in the home page).


10) The lenses.
Check the condition of the lenses : scratches, dust, fungus.
Viewing lens : open the viewer cover under a bright light and look at the lens. You can also check the internal mirror.
The potentially degraded state of the viewing lens has no impact on picts, it will only affect the quality of the viewing image and, maybe, your precision on focusing.
Taking lens : open the back cover and release the shutter and hold under B position while you're looking through the lenses.
The condition of the taking lens remains binding.
a) claws : if they are small, they will not affect the picts quality.
If they are larger and affect the picts, change the lens.
b) dust : also the size and quantity of dust present outside or inside the lenses will affect your picts.
Allow disassembly to remove the dust.
c) fungus : its presence often results of a camera storage in relatively damp and dark conditions.
At first, leave the camera in the sun for a few days, the mushrooms should disappear.
Disassemble the lenses and clean them.
Then avoid leaving your camera too much locked in a damped place when not in use.
If the fungus have damaged the lenses, replace them.
11) The frame counter.
It happens some parts wear out, become detach or break.
Without film, we cannot check the operation of the winding and the frame counter.
One may work and the other may not or vice versa.
To check if the frame counter is working correctly, take a strip of black paper from a previous exposed 120 film. The strip of paper must be wound on an empty reel as if it were a new film.
Load it into the camera like a normal film, close the back cover, then wind to the first frame. The crank should lock.
If not, there is a problem.
Turn the cranck back to its neutral position in its stirrup.
The counter must indicate "1" through the small upper porthole (n° 1 on the image).
If your Autocord has one, a red mark will appear in the lower porthole (n° 2 on the image), indicating that the device is ready to be triggered .
If not, there is a problem.
Trigger, cock to the next frame, make sure the counter advances to the next number.
If not, there is a problem.
Also check that the film advance is going well: the crank locks between 120° and 150° from its initial position.
If the crank exceeds 180°, there is a problem (worn internal pinion).
Also check the operation of the double exposure button (n° 3 on the picture).
Rock it to the left, hold and then start turning the crank backward. Release the button, complete the crank turn.
The shutter is cocked but the film has not advanced. And neither does the frame counter.
If not, there is a problem.
Trigger.
Review the 12 positions of the frame counter.
Finally, continue winding until you unhook the strip of paper from the transmitter reel.
Open the back cover, take out the take-up spool, put an empty spool in it.
If your camera responds OK to all of these checks, you are ready to load a film.
The film must be loaded into the upper part of the camera then goes down to the take-up reel.
Refer to owner's manual for details (see the "Related Sites" in the home page).
Remember these cameras are of fine mechanics.
There's no electronic in - except those equipped with a selenium cell or CDS.
_edited.jpg)